A DIY cat wall brush gives your cat a scratching and grooming spot they'll actually use — and it costs almost nothing to build. Cats love rubbing against corners and rough textures, so mounting a brush on the wall puts that instinct to work. You get a happier cat and less fur on your furniture.
Key Takeaways

- Cost: Most DIY cat wall brushes cost under $10 to build with basic supplies.
- Materials: You can use a scrub brush, bottle brush, or stiff-bristle brush mounted to wood or directly to the wall.
- Placement: Mount the brush at your cat's cheek or shoulder height for best results.
- Safety first: Use non-toxic adhesive or wall-safe hardware so the brush stays secure.
- Customise it: Add catnip or extra bristle strips to make the brush more attractive to your cat.
What Is a DIY Cat Wall Brush?
The Basic Idea
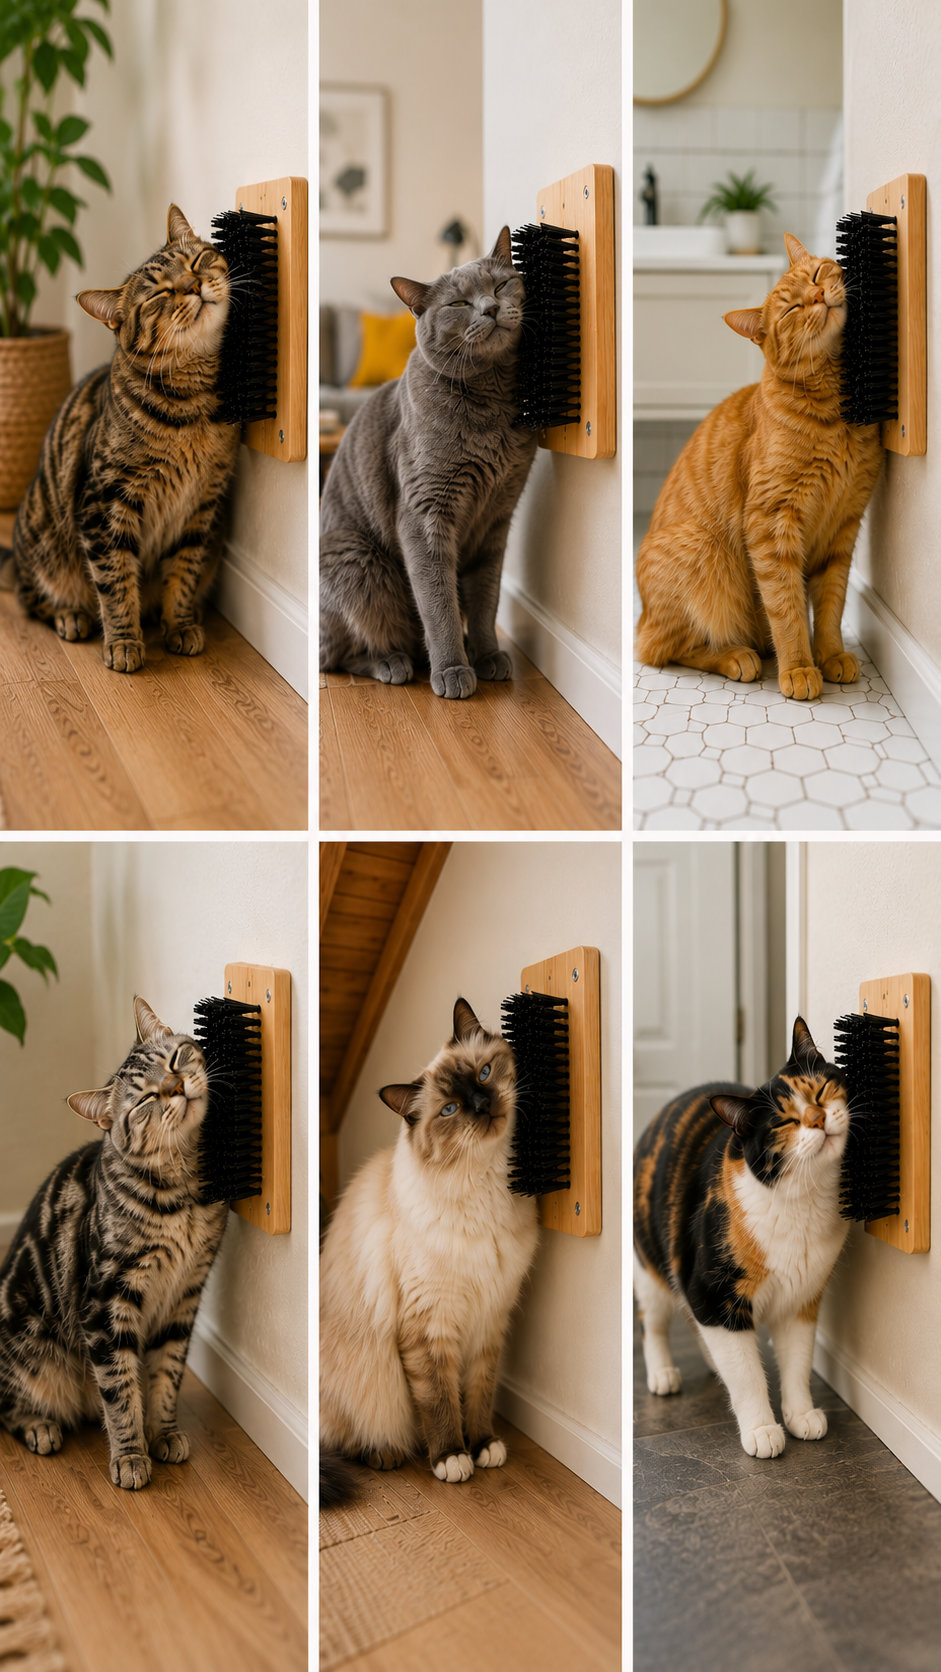
A cat wall brush is a bristled brush fixed to a wall, baseboard, or corner at cat height. Your cat walks up and rubs their face, chin, and body against it. It mimics the feeling of rubbing against tree bark or rough surfaces in the wild.
Unlike a freestanding grooming toy, a wall-mounted brush won't tip over or slide away. That makes it far more satisfying for your cat to use. Many cats become instantly hooked on them.
Why Cats Love It
Cats have scent glands on their cheeks, chin, and forehead. Rubbing against surfaces deposits their scent and feels deeply satisfying. A wall brush lets them do exactly that on demand.
It also helps remove loose fur and reduces shedding around your home. Think of it as a self-grooming station your cat manages entirely on their own. That's a win for both of you.
How It Differs From Store-Bought Options
Commercial cat wall brushes exist, but they're often pricey for what they are. A DIY version gives you full control over size, bristle stiffness, and placement. You can also replace individual parts as they wear out without buying a whole new product.
What You'll Need to Build One

Brush Options
The best brushes to use are stiff-bristle scrub brushes, long-handled bottle brushes, or even a dish brush with firm nylon bristles. Look for brushes with bristles that are firm but not sharp — you want stimulation, not scratching. Check the dollar store, hardware store, or online for cheap options.
You can also use a strip of carpet or sisal rope alongside the brush for extra texture. Some cat owners combine a brush with a scratching pad on the same board. Giving your cat variety keeps the station interesting.
Mounting Materials
You'll need either a small piece of wood (like a offcut of 2×4), heavy-duty double-sided tape, or wall-safe screws and anchors. A wooden base makes it easier to reposition and protects your wall from damage. If you rent, choose adhesive strips rated for heavier loads.
Command strips work for lightweight brushes on smooth walls. For heavier setups or textured walls, use a small screw through the brush handle into a wall stud. Always check your wall type before you drill.
Tools You'll Need
- Drill or screwdriver (for screw-mounted builds)
- Measuring tape
- Pencil for marking height
- Sandpaper (to smooth any wood edges)
- Strong adhesive or zip ties (optional depending on design)
- Non-toxic paint or sealant if you want to finish the wood
Step-by-Step: How to Build a DIY Cat Wall Brush

Step 1 — Choose and Prep Your Brush
Pick a brush with a flat back that sits flush against a surface. Scrub brushes with a handle on the back work perfectly. Remove any paper labels and rinse the brush to clear off any chemical residue before mounting.
If your brush has a hanging hole, that's your mounting point. No hole? Use zip ties, heavy-duty wire, or drill through the handle yourself. Make sure the attachment point is strong enough to handle daily rubbing.
Step 2 — Mount It to a Wood Base (Optional but Recommended)
Cut a piece of scrap wood slightly larger than the brush. Sand the edges smooth so there are no splinters. Attach the brush to the wood using screws, zip ties, or strong adhesive, then let it cure fully before mounting to the wall.
Using a wood base gives you more flexibility. You can repaint it, swap out brushes, or move the whole unit easily. It also looks tidier than a brush stuck directly to drywall.
Step 3 — Find the Right Height and Location
Measure your cat's cheek height when they're standing normally — usually 4 to 8 inches from the floor. Mark that spot on the wall with a pencil. Corners are ideal because your cat can rub both sides of their face at once.
Place the brush near a spot your cat already rubs — like a door frame or baseboard corner. Cats are creatures of habit. Putting the brush in a familiar rubbing zone speeds up how quickly they adopt it. You can read more about Festive Felines: Cats And Christmas Trees to understand your cat's grooming routines better.
Step 4 — Secure to the Wall
Use your chosen mounting method — screws into a stud, wall anchors, or heavy-duty adhesive strips. Double-check it's level before finalizing the position. Give it a firm tug before letting your cat near it to make sure it won't pull free.
If you used adhesive, wait the full curing time listed on the packaging. A brush that falls off mid-use can scare your cat away from it permanently. Solid installation is worth the extra hour of waiting.
Step 5 — Introduce Your Cat to It
Don't force your cat to use the brush right away. Rub a little catnip on the bristles and let curiosity do the work. Most cats will sniff it, then start rubbing within a day or two.
You can also gently pet your cat near the brush so they associate it with positive feelings. Some cats take longer — especially shy or older cats. Be patient and keep the area calm and accessible. Check out our guide on 10 Effective Tips on How to Keep Cats Away from Christmas Trees for more tips on encouraging cats to use new enrichment tools.
Design Variations to Try

The Corner Brush Setup
Mount two brushes on either side of a wall corner so your cat can rub both cheeks simultaneously. Use L-shaped brackets or angle the wood base to fit snugly into the corner. This is the most popular layout because it feels most natural to cats.
The Baseboard Brush
Attach a flat brush along the baseboard at floor level for cats who like to rub low. This works especially well for cats who regularly drag their body along the skirting boards. It's quick to install and almost invisible in a room.
Multi-Brush Wall Station
Mount a panel of wood and attach several brushes at different heights and angles. Add a sisal rope section and a small catnip pouch to create a full enrichment station. This is a great weekend project if you have multiple cats or a cat who craves stimulation. For ideas on keeping your cat mentally active, explore our article on Ultimate Guide To Cat-Friendly Christmas Tree Ideas.
Safety Tips to Keep in Mind

Check Bristle Quality
Avoid brushes with metal wire bristles — these can scratch or cut delicate skin. Stick to nylon, natural fiber, or silicone bristles. Run the back of your hand across the brush before mounting it to test how it feels.
Replace the brush as soon as bristles become bent, frayed, or start to fall out. Loose bristles are a choking hazard if your cat chews on them. Inspect the brush every few weeks as part of your regular routine.
Secure Mounting Is Non-Negotiable
A poorly mounted brush can become a hazard if it falls while your cat is using it. Always test the stability by pressing firmly on all sides before your cat gets access. If the mount feels loose at any point, fix it immediately.
Non-Toxic Materials Only
If you paint or seal the wood base, use only pet-safe, non-toxic finishes. Cats will lick and rub their face directly on the surface. Water-based paints that are labeled non-toxic once dry are your safest bet.
Avoid pressure-treated wood, which often contains chemicals harmful to cats. Untreated pine, cedar, or plywood are all good choices. Sand everything smooth to remove splinters before your cat uses the station.
Frequently Asked Questions
What type of brush works best for a DIY cat wall brush?
A flat-backed scrub brush with firm nylon or natural fiber bristles is the top choice. It sits flush against the wall and provides the right amount of texture. Avoid metal wire brushes, which are too harsh for cat skin.
How high should I mount a cat wall brush?
Mount the brush at your cat's cheek or shoulder height — typically 4 to 8 inches from the floor. The goal is for your cat to rub their face against it naturally while standing. Adjust after watching how your cat approaches it for the first few days.
My cat ignores the wall brush — what should I do?
Rub dried catnip directly onto the bristles to spark interest. You can also use a toy or treat to lure your cat close and let them discover the brush themselves. Give it at least a week before deciding it's not working — some cats just need time.
How do I clean a cat wall brush?
Remove the brush from the wall if possible and rinse it under warm water. Use a small comb or old toothbrush to pull out trapped fur from the bristles. Let it dry fully before remounting so it doesn't harbor mold or mildew.
Can I use a cat wall brush if I rent my home?
Yes — use heavy-duty removable adhesive strips rated for at least 5 to 7 pounds for lightweight brush builds. Test the adhesive on a hidden wall patch first to check it won't damage the paint. Always follow the removal instructions carefully when you move out.
Final Thoughts
A DIY cat wall brush is one of the easiest and cheapest ways to improve your cat's daily life. It takes less than an hour to build, costs next to nothing, and gives your cat a grooming outlet they'll return to again and again. Start simple, watch how your cat uses it, and adjust from there.
This website contains affiliate links. As an Amazon Associate and an affiliate for other programs, I earn from qualifying purchases. Clicking on an affiliate link may result in a commission being paid to me at no additional cost to you.





Leave a Reply